|
Note:
These tutorials assume a basic working knowledge of Paint Shop Pro.
If you are unsure how to configure the program to
perform any of the steps described below, please refer to the Help
files and manuals included with the program.
In this demonstration,
we will show you an example of how to modify an existing template
to suit your own needs. For this example you will need to open
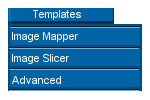
Template 1
from our Image Mapping tutorial. There is an endless variety
of modifications that you can perform to the existing templates with
Paint Shop Pro. This is merely one example. The rest is up to your imagination.
|
|
|
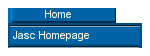
Below you will see a comparison of our original template and how it will look once we're done modifying it.
|

Original Image

New Image
|
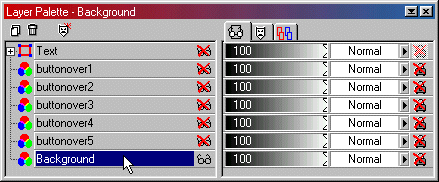
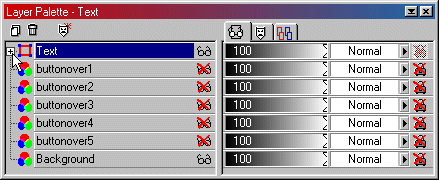
1) Let's begin by changing the appearance of the Background layer. Turn off all other layers and select
the Background layer by clicking on it as shown below.
|
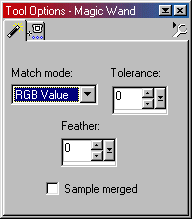
2) Using the Magic Wand tool, adjust the settings as follows:
|
3) Select an area outside of the Background image with the Magic Wand tool.

|
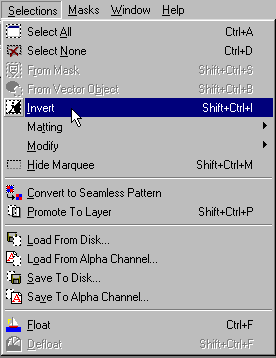
4) Invert the selection.
|
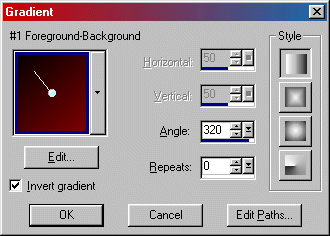
5) Choose the Flood Fill tool and adjust the settings as shown below.

|
6) For our example, we choose a linear gradient of black (RGB value 0,0,0) and maroon (RGB value 128,0,0) and adjusted the settings accordingly.
|
7) Using the Flood Fill tool, change the color of the Background layer by clicking within the inverted selection as shown below.

|
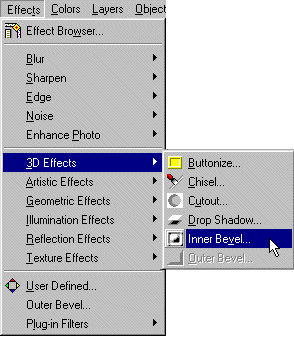
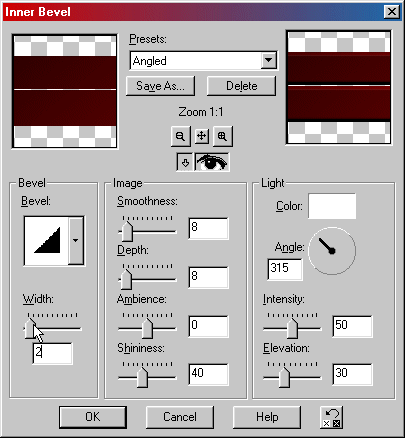
8) Next we will apply an Inner Bevel.
|
9) Select the Angled preset in the drop-down of the Inner Bevel dialog and change the width to 2.
|
|
10) Using the same techniques described in Steps 2-5 above, change the appearance of the remaining Button-Over layers by selecting a different color(s). Apply the same Inner Bevel settings as in the previous step.
Note: For our example we choose a linear gradient of light yellow (RGB value=255,255,192) and blue (RGB value=0,0,128).

|
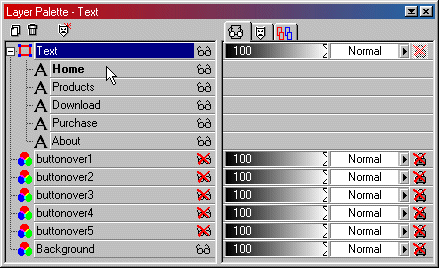
11) Now that we have the Background and Button-Over layers modified, let's change the appearance of our text. With the Background and Text layers turned on, select the Text layer and expand it by clicking on the + sign located just to the left of the Text layer name.
|
12) This will display the text sub-layers. Double-click on the Home text layer to open up the Text Entry dialog.
|
|
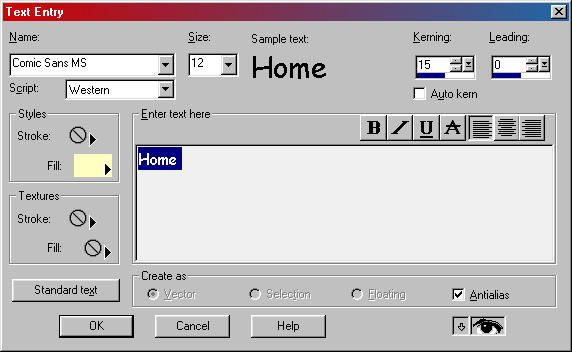
13) At this point, you have many available options. You can change the font, font size, stroke, fill, etc. For this example, we will change the font type, size, fill, and kerning (the space between the characters) as well as removing the bold option.
Apply the same settings to the remaining text sub-layers.
Note: The RGB value of the yellow that we choose for our fill color is (255,255,192).
|
14) This is how the new image should look with the Button-Over layers turned off.
|
|
15) Once this is complete, you may refer back to Step 1 of the Image Mapping tutorial and proceed from there. If you have already completed the Image Mapping tutorial, you may
load the map settings that you previously saved in Step 12 of that tutorial. This will save you from having to re-map your image.
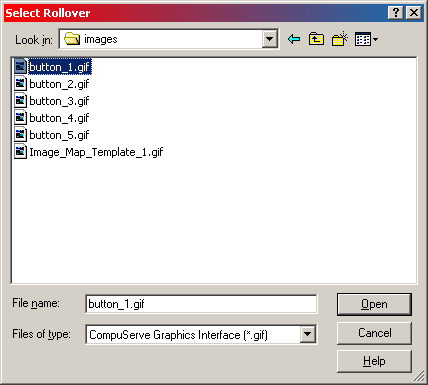
Note: Make sure that you select your new images when using the Rollover Creator.
|
|
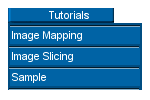
16) Here is the finished image (complete with rollover effects).

|